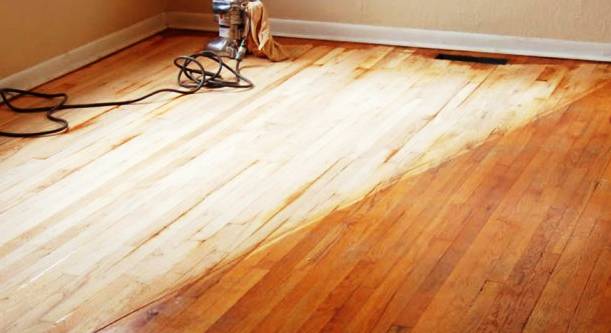
Sanding wooden floors is a professional project but with the right guidance, it can become into well-done DIY task. Congratulations, if you are brave enough to perform sanding wood floor project by your own. Whether you’re renovating an old floor or preparing a new installation for finishing, this guide will take you through the steps necessary to achieve a smooth, beautiful result.
The first step is to understand the goal of floor sanding. This is a process applied to remove the top surfaces of wooden floors. The purpose of performing the floor sanding process is to get rid of the top layer of the floor which is worn or damaged.
The floor sanding process can restore the beauty of the floor and bring shine to the worn surfaces. This floor project provides a fresh and clean appearance of wooden floors. After you know what is the goal you will try to achieve is time to have a look at the DIY guide for wooden floor sanding.
Preparation of the tools
Before we start with our step-to-step guide we will provide you with a full list of the materials, tools, and equipment you need to perform the task. You need to gather the following things:
- Drum sander;
- Edge sander;
- Sandpaper (coarse, medium, and fine grits);
- Vacuum cleaner;
- Dust mask and safety goggles;
- Tack cloth or microfiber cloth;
- Plastic sheeting and painter’s tape;
- Wood filler (if necessary);
- Floor buffer (optional).
Don’t forget about the safety
Safety first! Be sure you take all the safety measures before you start with the sanding process. It’s very important to wear a face mask and gloves to protect yourself from dust and debris. You have to also take measures to ensure proper ventilation in the work area.
The last thing to do before you start is to remove all the furniture and cover doorways and vents with plastic sheeting to contain dust.
Inspect the floor
Check the floor for nails or staples sticking up from the floor. If there are some use a hammer and punch to sink any protruding nails. Then fill any large gaps or holes with wood filler and allow it to dry completely before sanding.
Sanding process: how to sand wood floors
It’s time to get to the point. After you collect all the necessary tools and equipment and inspect the floor is time to start the sanding process. The first step is to initial sanding with a drum sander. Load the drum sander with coarser grit sandpaper. Begin from the corner of the room and move in the direction of the wood grain. Move the sander slowly and steadily to ensure even sanding. We suggest you overlap each pass slightly to ensure complete coverage.
After the first step is completed, you have to vacuum-clean the floor and remove the dust and debris. Inspect the floor again to check for uneven areas. Then repeat the sanding if is necessary.
The next thing you have to do is to use an edge sander loaded with the same coarse grit sandpaper to sand the edges and corners of the room. After you finish with this step switch to medium grit. Replace the coarse-grit sandpaper with medium grit on both the drum sander and edge sander.
Repeat the sanding process and move in the direction of the wood grain. Vacuum-clean the floor again after you finish this step.
The last thing you have to do is to replace the medium grit sandpaper with fine grit. Then sand the entire floor once more, ensuring a smooth, even surface.
Final steps and finishing
After you finish with the sanding process you have to inspect the floor one more time. Have a look on the entire floor to ensure it is completely free of dust. Then remove the plastic sheeting and clean the surrounding area.
One of the last steps is to clean the floor. Wipe the surface to ensure it is completely free of dust. In the end, remove the plastic sheeting and clean the surrounding area.
Once the floor is clean and smooth, the surface is ready for staining and sealing. If you wonder what finish to choose, you can contact the team of ReSand.co.uk for professional advice.
Some things to consider before you start your DIY project
Floor sanding is not an easy task. This can be a labor-intensive and time-consuming process. If you are not sure you have the knowledge and the skills to do it by your own, you can choose professional service. Sometimes is better to pay more but to be sure that you will be satisfied with the result.
However, if you want to improve your skills, you can follow our DIY floor sanding guide. We provided you with detailed information on how to sand wood floors. It’s time to try it out. Happy sanding!

Lily Edwards is a dedicated blog author for ReSand.co.uk, using her background in Interior Design to write insightful articles on floor care, including sanding, oiling, and polishing.
When she's not crafting informative blog posts, Lily enjoys exploring the British countryside, antique hunting, and indulging her love for DIY home improvement projects.
